Part 5: Showing token information
You can use Taquito to retrieve information about tokens from Tezos. In this section, you retrieve information about the connected user's tokens and show them on the web page.
The process takes a few steps because of how the data about the token owners is stored. The ledger that records the owner of each token isn't stored as a simple table or as a single object. Instead, each entry in the big-map (in this case, an entry that represents the owner of each token) is lazily deserialized. In other words, when you look up the owner of a token, Tezos reads only the entry for that token ID, not the entire table of owners. Reading a single entry like this reduces the cost of reading data from the ledger, especially as the ledger gets large. For more information about maps and big-maps, see Big-maps and maps.
Getting token owners
If you ignore the internal complexities of how the data is stored in the big-map, you can imagine that the contract stores data about the NFT owners in a table. One column of the table stores the ID of the NFT and the other column stores the address of the owner, as in this example:
| Token ID | Owner |
|---|---|
| 0 | tz1QCVQinE8iVj1H2fckqx6oiM85CNJSK9Sx |
| 1 | tz1QCVQinE8iVj1H2fckqx6oiM85CNJSK9Sx |
| 2 | tz1hQKqRPHmxET8du3fNACGyCG8kZRsXm2zD |
| 3 | tz1Z2iXBaFTd1PKhEUxCpXj7LzY7W7nRouqf |
Data about fungible tokens is stored differently; see Tokens for examples.
In this section, you create a function to read the data from the contract's ledger to find the IDs of the tokens that the connected account owns.
-
In the
src/App.sveltefile, add a top-level variable to represent the list of tokens that the connected account owns:let userNfts; -
Add a function that retrieves the NFTs that the user owns and puts them in the top-level variable:
const getUserNfts = async () => {
  if (!address) {
    return;
  }
  // Get the ID of the big-map that records token owners
  const contract = await Tezos.wallet.at(nftContractAddress);
  const nftStorage = await contract.storage();
  const ledger = nftStorage['ledger'];
  const ledgerID = ledger.id.toString();

  // Get the contents of the big-map
  const data = await fetch(`${rpcUrl}/chains/main/blocks/head/context/raw/json/big_maps/index/${ledgerID}/contents`);
  const keys = await data.json();

  // Get the owner of each NFT
  const tokenOwners = await Promise.all(
    keys.map((_k, index) => ledger.get(index.toString()))
  );

  // Filter to the IDs of the tokens that the connected address owns
  userNfts = tokenOwners.reduce((matchingIndexes, ownerAddress, index) => {
    if (ownerAddress === address) {
      matchingIndexes.push(index);
    }
    return matchingIndexes;
  }, []);
};
This function starts by requesting the storage of the contract. However, due to the way that big-maps are stored, the contract storage that Taquito provides does not contain the token owners. Instead, it contains an ID of the big-map, which the code uses to retrieve the current fields in the big-map. Then it retrieves the data in each of these fields, which is the address of the account that owns the token for a given ID.
-
Call the
getUserNftsfunction at the end of theconnectWalletandcreateNFTfunctions. -
In the
<main>section, after the "Create NFT" button, add a section that shows the NFTs that the connected account owns:<div class="user-nfts">
{#if userNfts?.length > 0}
<p>
IDs of your NFTs:
{#each userNfts as nftID, index}
{nftID}
{#if index < userNfts.length - 1}
<span>, </span>
{/if}
{/each}
</p>
{:else if userNfts?.length === 0}
<p>The connected account has no NFTs.</p>
{:else}
<p>Loading this account's NFTs...</p>
{/if}
</div> -
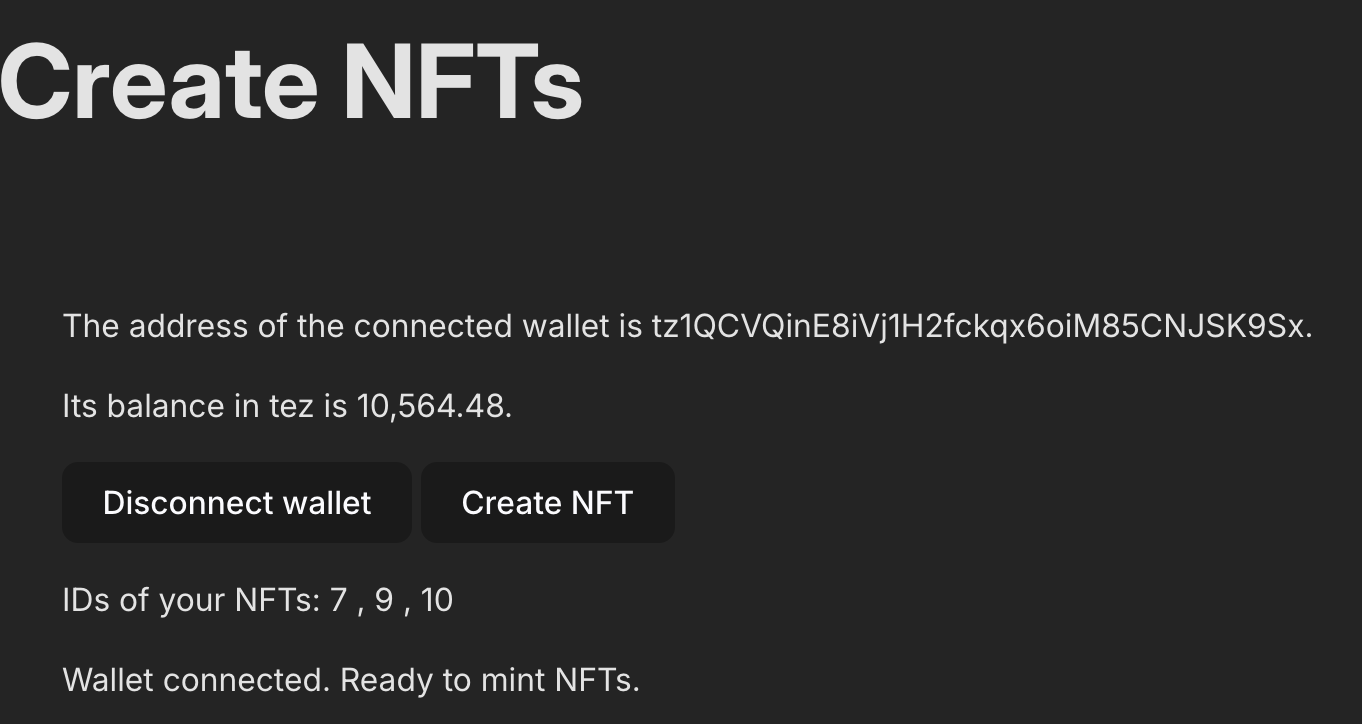
Run the application. After you connect your wallet, the application should show the IDs of the NFTs that the connected account owns, as in this picture:

If you don't see the IDs of the NFTs that your account owns, compare your source code to the code in https://github.com/trilitech/tutorial-applications/tree/main/create-nfts/part-5.
Now you can get information about NFTs in web applications. You could extend the application to provide links for each NFT, a table of the NFTs and their owners, or a thumbnail image for each NFT. For some closing information about the tutorial, see the Summary.